
Thank you for reading our post, please rate this article at the end.
Reading Time: 6 minutesLast Updated on November 15, 2026 by Paul Clayton
To learn how to level a travel trailer, remember the order: park on the flattest spot you can find, level side to side first with leveling blocks while the trailer is still hitched, chock the wheels, unhitch and level front to back with the tongue jack, then lower the stabilizer jacks for firmness. Done in that order, the whole job takes about 15 to 30 minutes and keeps your fridge, doors, drains, and sleep working the way they should.
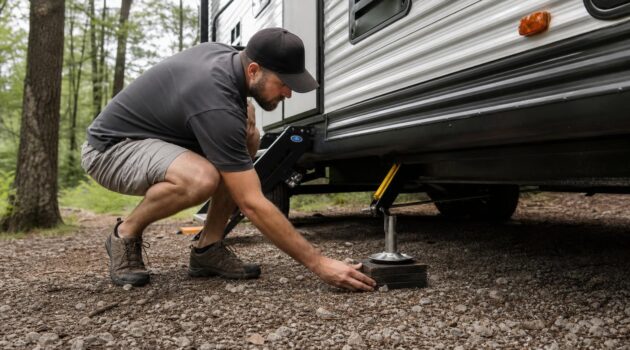
Table of Contents
Key Takeaways
| Step | What To Do | Tool Needed |
|---|---|---|
| 1. Pick the spot | Choose the flattest, debris-free site with room to pull forward and back | Your eyes and a walk-around |
| 2. Side to side | Drive the low-side tires onto blocks while still hitched | Leveling blocks, bubble level |
| 3. Chock | Chock the wheels before you unhitch | Wheel chocks |
| 4. Front to back | Unhitch and raise or lower the tongue jack | Tongue jack, wood pad |
| 5. Stabilize | Lower the corner stabilizers onto pads to stop rocking | Stabilizer jacks, wood pads |
| Never | Use stabilizer jacks to lift or level the trailer | They are not built to carry the weight |
Why You Should Level a Travel Trailer
A level trailer is more than a comfort issue. The biggest reason is the refrigerator. Most travel trailers use an absorption refrigerator that runs on propane or electric heat and relies on gravity to move the cooling solution through its tubes. When the trailer sits badly out of level, that flow can stall, the fridge stops cooling, and over time the cooling unit can be damaged. Manufacturers generally say the fridge only needs to be within a few degrees of level, so check your refrigerator manual for its exact tolerance. Compressor-style 12-volt fridges are far less sensitive, but the rest of the trailer still benefits from being level.
Comfort is the second reason. Doors swing shut or fly open, sinks and showers drain poorly, food rolls across counters, and sleeping on a slanted bed is miserable. For a deeper look at the reasons, see our article on why you should level a travel trailer.
Does a Travel Trailer Need to Be Level When Not in Use?
If the trailer is parked in storage with the refrigerator off, it does not need to be perfectly level. Prop the fridge door open to prevent mold, and park so rain runs off the roof instead of pooling. If you plan to run the fridge while it sits in your driveway, level it just as you would at a campsite.
Campground Parking Considerations
Where you park decides how hard leveling will be. Look for a campsite that is already close to flat, because the steeper the slope, the more blocks and effort you will need. Make sure there is room to pull forward and back a few feet, since you will drive the trailer onto blocks. Clear the pad of rocks, branches, and debris before you start, and avoid soft ground that could let blocks or jacks sink after a rain.
Tools You Need to Level a Travel Trailer
Wheel Chocks
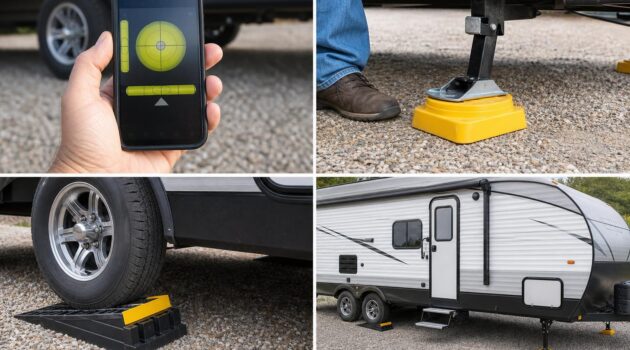
Wheel chocks hold the tires in place once the trailer is level and before you unhitch. Buy a proper set from an RV or hardware store rather than counting on finding rocks or logs at the campsite.
Leveling Blocks
Leveling blocks go under the tires on the low side to raise it. There are two main styles, stackable blocks and sloped or curved levelers, which we cover below. You can also read our guide to RV leveling blocks.
A Level
Many travel trailers have bubble levels mounted on the front and side. If yours does not, a simple bubble level or a small torpedo level works well and is inexpensive. Digital and app-based levels are also available if you want a reading in inches of lift needed.
Wood Pads
Wood boards or plastic jack pads spread the load under the tongue jack and stabilizers so they do not sink. A few 2 x 10 boards cut into short pieces, about four to eight in total, cover most travel trailers.
How to Level a Travel Trailer Step by Step
Step 1: Level Side to Side
Always start side to side, because it is the harder adjustment and you need the tow vehicle attached to move the trailer onto blocks.
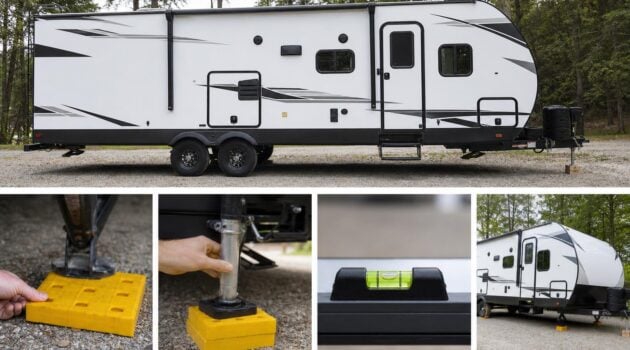
- Check the level. Use the level on the front or back of the trailer, or lay your own level across the doorway from left to right. The low side is the side to raise.
- Place the blocks. Set your leveling blocks in front of or behind the low-side tire, depending on which way you will drive. On a tandem axle trailer, put blocks under both tires on that side.
- Drive onto the blocks. Pull slowly onto the blocks with a spotter watching. The tire should sit fully on the block with no part hanging over the edge.
- Recheck and adjust. Add or remove a block and repeat until the bubble is centered.
- Chock the wheels. Chock the tires on the side that is not on blocks, on the downhill side of the tire, before you unhitch.
Step 2: Level Front to Back
Front-to-back leveling is done with the tongue jack. Manual jacks work fine, and a powered tongue jack makes the job push-button easy.
- Pad the jack. Set a wood pad or jack pad under the tongue jack foot.
- Unhitch. With the wheels chocked, lower the jack onto the pad, unhitch, and move the tow vehicle away.
- Check the level. Read the level on the side of the trailer, or lay your level front to back in the doorway.
- Adjust the jack. Raise the tongue if the front is low and lower it if the rear is low. Check the level after each adjustment until it is centered.
Step 3: Stabilize the Trailer
Stabilizing does not make the trailer more level. It stops the bounce and rocking you feel when people walk around inside. Set a wood pad under each corner stabilizer jack and lower each one until it is snug on the pad.
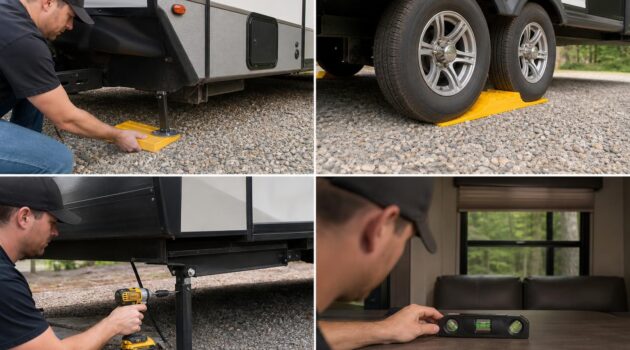
Warning: Never use the stabilizer jacks to lift a low side or corner. They are not designed to carry the weight of the trailer, and trying to level with them can bend the jacks or damage the frame. If your trailer has no stabilizers, portable jack stands can do the same job. For more practical advice, see our RV leveling tips.
Choosing Leveling Blocks for Your Travel Trailer
Stackable Block Levelers
Stackable levelers look like large interlocking building blocks. You build a small ramp or platform to the height you need, so they handle uneven sites well. A single kit usually has about ten pieces, so owners of heavier trailers or those who camp on rough sites often carry two kits.
Sloped and Curved Levelers
Sloped levelers are one-piece wedges. You drive up the ramp until the trailer is level and stop, with no stacking. Curved levelers, made popular by Andersen, rock upward as the tire rolls forward and come with a chock that slides under them to lock the position. They are quick and precise but have a fixed maximum lift, so a very steep site can exceed what they offer.
Width and Weight Capacity
Whatever style you choose, the leveler must be at least as wide as your tire, and preferably wider, so no part of the tread hangs off the edge. Also check the weight rating against your trailer’s loaded weight per tire. An undersized leveler can crack under load and drop the trailer without warning.
How to Level a Travel Trailer FAQ
Should I level a travel trailer side to side or front to back first?
Side to side first, while the trailer is still hitched. You need the tow vehicle to drive onto blocks. Front to back comes second, after you chock and unhitch.
How level does a travel trailer need to be?
Centered bubbles on a basic level are good enough for comfort and for most refrigerators, which only need to be within a few degrees of level. Check your refrigerator manual for its specific limits.
Can I use stabilizer jacks to level my trailer?
No. Stabilizer jacks only steady the trailer. Lifting with them can bend the jacks or damage the frame. Use blocks for side to side and the tongue jack for front to back.
What can I use if I do not have leveling blocks?
Solid boards such as 2 x 10 lumber can work in a pinch, as long as they are wider than the tire and stacked like stairs. Purpose-made blocks are lighter, stronger, and easier to use.
How long does it take to level a travel trailer?
Most owners can level a travel trailer in 15 to 30 minutes once they have done it a few times. A flat campsite and the right gear make it faster.
Final Thoughts
Leveling a travel trailer comes down to a simple routine: pick a good spot, level side to side with blocks, chock, unhitch, level front to back with the tongue jack, and stabilize. Practice it at home once or twice and it becomes second nature at the campsite. For more detail on techniques and safety, read our ultimate guide to RV leveling, and if your fridge still struggles after leveling, see our guide to an RV refrigerator that is not cooling.
Resources
- Dometic RV refrigerator owner manuals
- Norcold RV refrigerator owner manuals
- Andersen Hitches product guidance for camper levelers
- RV Industry Association consumer resources