Thank you for reading our post, please rate this article at the end.
Reading Time: 7 minutesLast Updated on April 15, 2026 by Paul Clayton
Table of Contents
Managing Water and Waste in Your RV
Key Takeaways
-
- Understanding the Tank System: RVs have three main tanks: the freshwater tank (for clean water), the gray water tank (for sink and shower water), and the black water tank (for toilet waste).
- Proper Dumping Sequence: Always empty the black water tank first, followed by the gray water tank. This allows the less contaminated gray water to flush and clean the sewer hose.
- Essential Gear: Key equipment for proper management includes a durable sewer hose (with a support to ensure proper drainage), a water pressure regulator to protect plumbing from high pressure, and a dedicated drinking water hose.
- Preventing Clogs and Odors: Use RV-specific toilet paper that dissolves quickly, and regularly use tank treatments. Avoid leaving tank valves open when connected to a full hookup to prevent solids from building up at the bottom.
- Dumping Safely: Always wear disposable gloves at a dump station. Use a dedicated, non-potable water hose for rinsing the sewer hose, and ensure all connections are secure to prevent leaks and spills.
Managing water and waste in an RV may feel overwhelming at first, but it doesn’t have to be complicated. When we understand how each system works and follow simple habits, we can keep our RV clean, efficient, and comfortable on every trip. From fresh water for drinking and cooking to proper disposal of gray and black water, it all comes down to knowing the basics and staying consistent with maintenance.
We’ll walk through how these systems work, the equipment that makes the job easier, and the right way to use and care for each tank. Along the way, we’ll cover how to prevent odors, avoid clogs, and make eco-friendly choices that save water and protect the environment.
- Today’s Best Pop Up Campers
- New vs. Used RV: Navigating the Price Trends
- Can You Rent an RV for a Year?
By the end, we’ll have a clear plan for handling water and waste without stress, so we can spend less time worrying about systems and more time enjoying the road.
Understanding RV Water and Waste Systems
Managing water in an RV means knowing how clean water enters the system and how wastewater is stored and removed. Each part of the setup has a specific role, and keeping it in good condition ensures safe, reliable use on the road.
Types of Holding Tanks
Our RVs rely on three main tanks: freshwater, gray water, and black water. The freshwater tank stores clean water for drinking, cooking, and washing. Its size varies by RV type, ranging from about 15 gallons in small Class B rigs to 100 gallons in larger Class A models.
The gray water tank collects used water from sinks and showers. Though less hazardous than sewage, it can still cause odors and clogs if not maintained. Using sink strainers and cleaning the tank regularly helps prevent buildup.
The black water tank holds toilet waste. This tank requires the most care, including RV-safe toilet paper and tank treatments to reduce odor. We always empty the black tank before the gray tank, using the gray water for rinsing the hose.
| Tank Type | Contents | Typical Range |
|---|---|---|
| Freshwater Tank | Potable water supply | 15–100 gal |
| Gray Water Tank | Sink and shower drainage | 20–90 gal |
| Black Water Tank | Toilet waste | 20–80 gal |
Key Components and How They Work
Our water pump pressurizes water from the freshwater tank, usually at 40-50 PSI. When connected to city water, this pump is bypassed, but we always use a pressure regulator to protect the plumbing.
The water heater provides hot water through propane, electricity, or both. Most RV heaters hold 6-12 gallons, which is smaller than home systems but sufficient for tasks such as showers and dishwashing.
Waste exits through the sewer outlet, controlled by valves. Black tank valves are usually black, while gray tank valves are gray for easy identification. Some RVs use macerators that grind waste and pump it to a dump station, making disposal easier in tight spaces.
We also rely on vent pipes to release gases and prevent odors from backing up into the living space. Without proper venting, even clean tanks can have an unpleasant odor.
How RV Sanitation Systems Differ from Home Plumbing
Unlike a house, our RVs carry water and waste in portable tanks, rather than being tied to permanent water and sewer lines. This means we must monitor tank levels and plan for refills and dumping.
Most RV plumbing uses lightweight plastic pipes and 12V pumps, while homes use heavier copper or PVC with constant water pressure. The compact design saves space and weight but requires more frequent checks for leaks or clogs.
With home toilets, waste flows directly to a sewer or septic system. In RV sanitation systems, the black water tank must be emptied at designated dump stations. Gray water may be allowed in some areas for irrigation, but black water never is.
Understanding these differences helps us avoid mistakes. For example, connecting to city water without a regulator can damage RV plumbing, while forgetting to vent tanks can cause odor issues. Learning these details ensures our RV waste systems stay safe and functional.
For a more detailed breakdown of RV plumbing basics, this guide explains the components and tank systems.
Essential Equipment for RV Water and Waste Management
Managing water and waste in an RV depends on reliable gear that keeps systems clean, safe, and efficient. The right tools prevent leaks, protect plumbing, and give us accurate information about our tanks.
Sewer Hoses and Connections
A sewer hose is one of the most important tools for emptying black and gray tanks. We need a durable hose, at least 15-20 feet long, to easily reach dump stations. Thicker hoses with reinforced walls resist punctures and last longer.
Using a sewer hose support keeps the hose elevated, which improves drainage and prevents standing waste. Supports also help maintain a steady slope, reducing clogs and odors.
Secure connections at dump valves are critical. Many RVers prefer locking fittings or cam lock systems for a tight seal. Products like the Waste Master system use a cam lock to prevent messy leaks during dumping.
We also keep disposable gloves, a clear elbow fitting, and a dedicated rinse hose. These extras make the dumping process cleaner and help us confirm when tanks are fully flushed.
Tank Sensors and Monitors
Tank sensors track the levels of fresh, gray, and black water. They help us avoid overfilling tanks and alert us when it’s time to dump. Many RVs come with basic sensors, but we often find them inaccurate due to buildup on the tank walls.
Upgraded monitors use external sensors that attach to the outside of the tank. These avoid false readings since they don’t touch the waste inside. Systems like SeeLevel provide digital readouts with improved accuracy.
Some monitors integrate with smartphone apps, letting us check tank levels without going inside the RV. This is especially helpful when boondocking, where water conservation is critical.
Regular cleaning, combined with tank treatments or flushing systems, helps keep sensors functioning properly. A clean tank ensures sensors give reliable readings, which saves us from guessing.
Water Pressure Regulators and Accessories
Campground water hookups often deliver inconsistent pressure. Without a water pressure regulator, high pressure can damage RV plumbing and fixtures. We use a regulator set to 40-50 PSI to maintain a safe and steady water flow.
Brass regulators last longer than plastic ones and resist cracking. Adjustable models with a gauge allow us to fine-tune the pressure according to the campground’s supply.
Other accessories improve water quality and safety. A sediment filter removes dirt and rust, while a portable water softener prevents scale buildup in pipes and appliances. Drinking water hoses, marked safe for potable water, ensure no chemicals leach into our supply.
We also keep spare washers, quick-connect fittings, and a Y-splitter. These small items make hookups faster and reduce wear on connections.
Proper Tank Usage and Waste Disposal
Managing our RV’s black water system and gray water system requires knowing how to use the toilet correctly, choosing the right supplies, and following safe dumping steps. Good habits reduce clogs, prevent odors, and keep our equipment in working condition.
Operating RV Toilets and Choosing Toilet Paper
RV toilets are designed to use less water than household toilets. We should press the flush pedal lightly to add water before use, then press fully to flush waste into the black water system. Adding a few inches of water to the bowl before solid waste helps prevent sticking.
Using the right toilet paper is just as important. RV-specific toilet paper breaks down faster than standard household brands. This reduces the chance of clogs and makes tank cleaning easier. Some regular toilet papers are labeled septic-safe, but testing them in water before use helps confirm they dissolve quickly enough.
We should also use tank treatments when needed. These products help control odor and aid in breaking down waste. While not always required, they can make a difference during long trips or in hot weather.
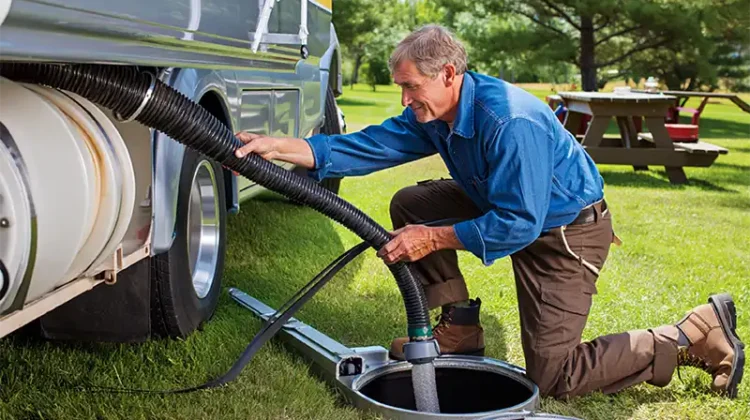
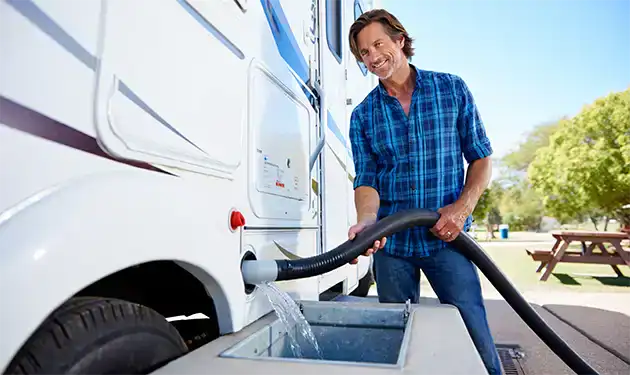
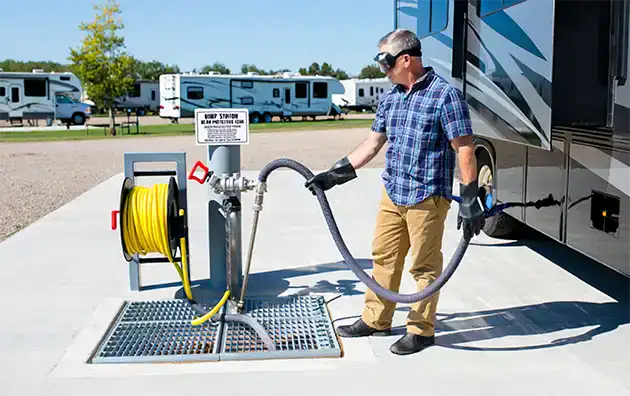
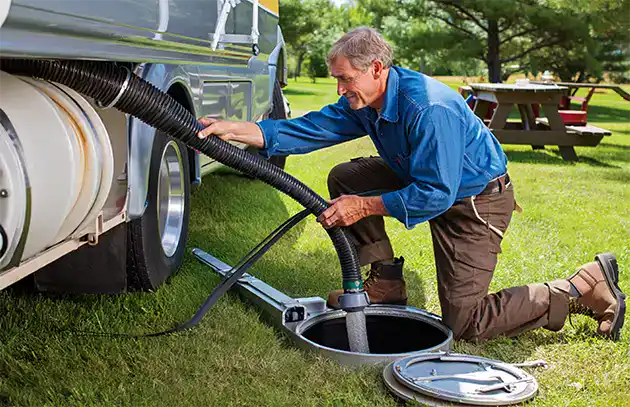
Using Dump Stations Safely
Dump stations are the main place to empty both black and gray water tanks. We must park close enough so the sewer hose reaches without stretching. Before connecting, it’s smart to wear disposable gloves and check that the dump station fitting is secure.
A proper connection keeps spills from happening. Attaching the hose tightly to the RV outlet and inserting the other end firmly into the dump station inlet prevents leaks. Some RVers use a clear elbow fitting to see when waste is finished draining.
After dumping, we should rinse the sewer hose with the station’s non-potable water hose. Never use our drinking water hose for this task. Many campgrounds provide clear instructions, and following them helps us avoid fines and keeps the area clean for the next user. For more guidance, see these RV waste disposal practices.
Dumping Sequence and Best Practices
The dumping order matters. We always empty the black water system first. This allows the stronger flush from the gray water system to rinse the hose afterward. Running the gray tank second helps wash out any leftover waste.
When connected to full hookups, it’s best to keep both tank valves closed until nearly full. This prevents solids from drying at the bottom of the tanks. A strong flow during dumping carries waste out more effectively than a slow trickle.
If our RV has a built-in black tank flush, we should use it regularly. Spraying clean water inside helps remove leftover debris and keeps sensors accurate. If not, a tank wand or portable rinser can do the job. More detailed steps are outlined in this guide to RV wastewater tanks.
Finally, after closing the valves and disconnecting the hose, we should cap the outlet tightly. This prevents leaks inside the storage compartment and keeps odors under control.
Final Thoughts
Effectively managing water and waste in an RV is a straightforward process once you understand the core systems and adopt good habits. By using the right equipment and following the proper dumping sequence, you can prevent common problems like odors and clogs.
Consistent maintenance and safe practices will ensure a clean, efficient, and comfortable experience on all your travels, allowing you to focus more on enjoying the journey.
Home page
Back to the top of the page